Leaderboard

Popular Content
Showing content with the highest reputation on 06/29/2017 in all areas
-

How to build a easy and inexpensive display stand
Christopher and one other reacted to Sonar505 for a topic
If you are anything like me you will find that over time your collection of vaping stuff will seem to magically grow by leaps and bounds. Especially if you start to DIY your own juice. And your patience with sorting through jumbled mess in a shoe box will quickly wear thin. With this in mind I came up with a no frills design that anyone can make cheaply (under $10) and very quickly but will allow you to expand as needed. Here Is what we are making. One for Juice bottles and One for Atomizers. First step is deciding where you are going to place it. Whether in a cabinet, cubbie hole, a desk or table top then measure and write down height,width, and length. Now we drive to Home Depot for the 2 types of wood needed. I already had the materials at home left over from other projects so I just made both. You can do the same or just one or the other. First the juice bottle one. You need a 2"x2"x8 foot board (although they actually measure 1 1/2" wide not sure why?) Cost is around $2 Now you decide if you want Home Depot to cut your wood to size which they will they just won't guarantee precision cuts. Based off of the measurements you took before, If your shelves are going to be less than 36" long then you need 3 of each size if more than 36" then you need 4 of each 2" 4" 6" 8" If more than 4 shelves high than go up on each piece by 2" This will form your bases. Next look for this cart somewhere in the lumber section. Look at the 1 1/2" size pieces (poplar is the cheapest) and grab the amount for the number of shelves you plan to make in either the precut sizes or have them cut down to the size needed by Home Depot. For my 2 units I used (1) 2x2x8 and (4) 1/4x1 1/2x48 hobby boards. The bottle space was 34" long so I needed 3 bases up to 8" high and 4 shelf's 34" long. I used (3) of the remaining 14" hobby boards on the atomizer shelf and cut (2) 6" high bases leaving me with a 10" piece of 2x2x8. Once back home find a flat place to work and grab any type of glue and start assembling the bases. Starting with the largest 2x2 piece lay it on it's side add glue to one side of next smaller size and stack it on top like so. While glue is still wet adjust the pieces so cut edge and sides line up as even as possible. Continue on until all bases are glued. Allow glue to dry for a few minutes. Place bases with cut edge down where you planned for with 3rd one in the middle or 3rd & 4th evenly spaced for longer shelf's. Then place hobby boards on other cut edge like so For the atomizer one there is an extra step. Grab a pencil, ruler, and some atomizers. Lay them like so. This will help you get a feel for how many will fit on your shelf and what spacing is needed between them. Then make 3/4 of an inch mark on both edges of shelf and using another shelf as straight edge draw a line down the center. Now transfer your spacing marks to that line. Now grab a drill and a bit that is slightly larger than your 510 connector on the bottom of the Atomizer (I used 9/32) and drill at your marks you can either drill all the way through or stop right before test with an atomizer to make sure base lays flat against shelf. Do the same for other shelves. Once you are done with that I recommend you glue shelves to bases. And were done! As I said at first no frills but very useful. Now you get to decide what else you could use this shelf for or maybe sand and stain or paint them. After finding more attys (I swear they are reproducing by themselves) I added a couple of more shelves And here is one way that I decided to finish it. As for me after looking at the first picture I really need to get my bottle labels under control and now I know exactly where to place them on the bottle for optimum viewing. Thanks for reading. As always all comments, critiques, and or questions are much appreciated.2 points -
Thanks for the nice comments very much appreciated. @mattythornton as for the level of my vape collection. Mrs. long gone and have been vaping since 2011. So watch out it tends to sneak up on you. You may one day find out it has turned into a hobby.2 points
-
It has been awhile since I last posted. So I thought I would share with you what I have been up to since then. There have been quite a few in that time so please bear with me. I will try and give descriptions when I can. Some you may have seen before but the majority I have never posted Here. First are some of the original mods I made. Some are in my personal collection and some I have sold. The next ones have all been sold off. They are a mix of Squonkers (Single and Dual Battery) Mechanicals, Unregulated, and Regulated. Plus Non Squonkers in (Single and Dual Battery) Mechanicals, Unregulated, and Regulated. Here is the latest batch of Mechanical Squonkers I just Sold off. pics to show size difference between mechanicals and unregulated with mosfet to protect switch. Here are some individual shots to give you an idea of what they look like inside. also some one offs in which I experiment with different techniques. Thanks for viewing . If there are any of these that you would like to see closeups on please feel free to ask. As always all Comments, Questions and or Critiques are very much appeciated.1 point
-

Bump when you get something in vape mail.
Steelerz 542 reacted to gadget for a topic
Got my Hohm Tech Hohm Slice 26650 today. This thing is awesome! Temperature Control mode with Kanthal is sweet. I've tested it with 3 different tanks and coil configurations from 0.25 up to 0.5 ohm and it works flawless once you get the custom curves dialed in. Sent from a galaxy far far away1 point -

Steep times
Walt reacted to Earthling789 for a topic
Like @Walt, I use a magnetic stirrer, which gives my juices a thorough blending, generates heat through agitation and general chemical exothermic reaction, and greatly reduces a need for steeping. Mostly, I mix my juices weeks before I will use them, so they do get plenty of "aging" time on the shelf before they are used, but they tend to taste the same the day I mix them, as they do months later.... Recommendations on heat work well, but be careful not to overheat them as they will become dark and the flavor can be harsh. Chocolates and custards do tend to get better with age, regardless.1 point -

Steep times
VapeMama reacted to mattythornton for a topic
Nice! Thanks for the tip VapeMama! Sent from my iPhone using Tapatalk1 point -
Here is what I made to control my collection of Atties, Driptips, and spare parts. I Thought I had already posted my how to build the base for this but apparently not so will remedy that soon. This is one way of finishing it off.1 point
-
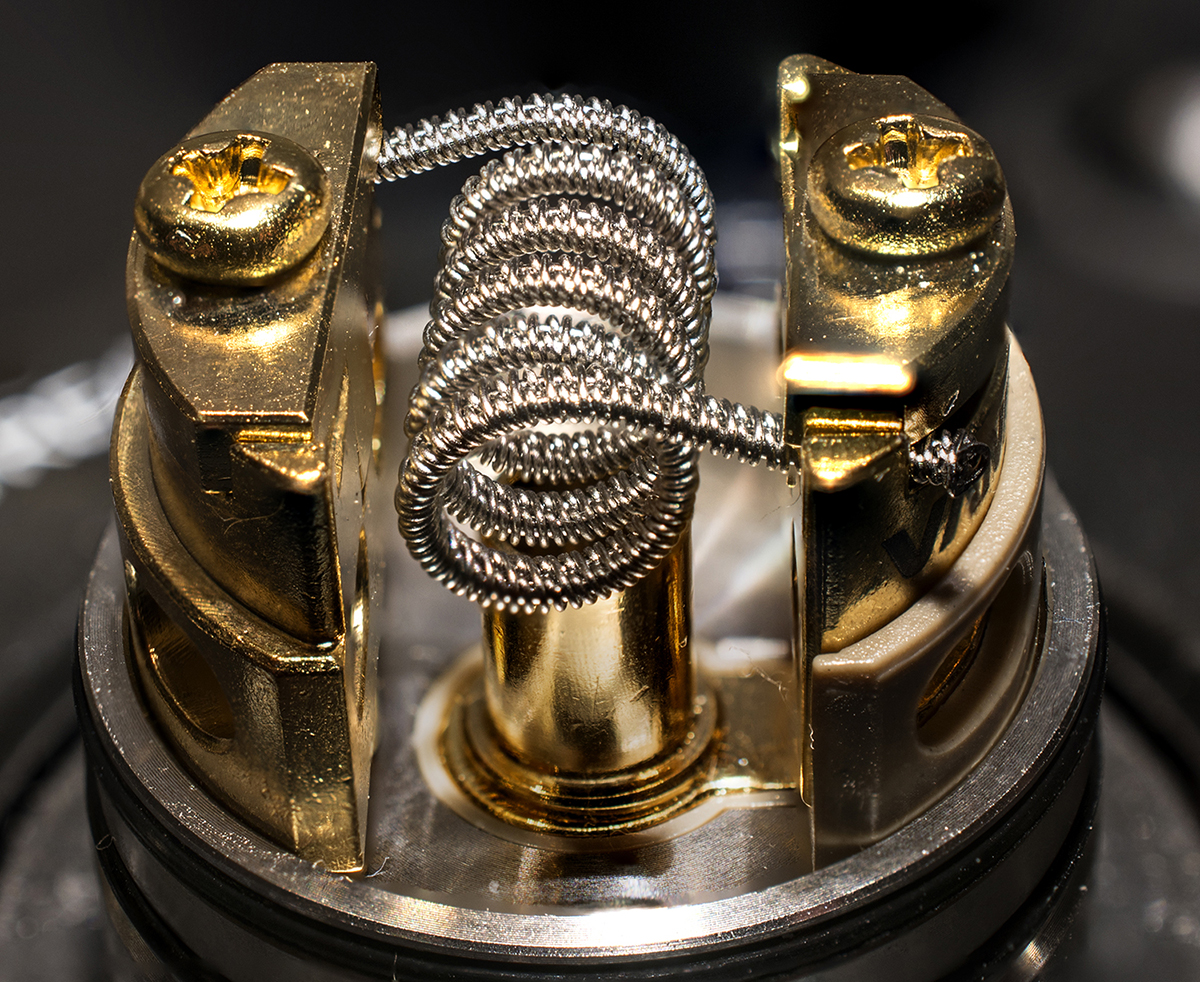
Have to admit I cheated on this one. This is actually six shots of the RDA at different focal points. Used PS to Focus stack and blend them into one. SS Staggered Fused Clapton 28/32x2 x 32.
 1 point