DragonGunner
-
Posts
603 -
Joined
-
Last visited
-
Days Won
3
Everything posted by DragonGunner
-
Hey Cany that is one very clean build. Heck dude that makes mine look sloppy. I can't find any fault with that build at all. I wouldn't mind the drop in the ohm. Mine all fluctuate a bit.
-
As soon as I get the chance I'm getting a second one as well. The original will get retired.
-
I thought that the new style of wicking (holes on side of chimney vs holes at base of chimney) wouldn't prove as efficient. Boy was I wrong. The new holes on the side of the chimney efficiently wick my cotton very well. I still fluff up my cotton ends a bit (not thinning) and just sort of gently stuff them down the chimney sides to cover the holes. I only vape heavy vg juices (80+vg) and the wicking keeps up superbly. I look forward to hearing what you all think.
-
Hahahaha that's interesting. Let me know how that goes. It looks simple enough. It should work with all the other clapton style coils as well.
-
Have you seen this clapton tutorial trick. I used it and it works flawlessly.
-

What did I learn about vaping today......
DragonGunner replied to cany's topic in General Vaping Discussion
Today I learned it's better to ask for forgiveness when buying new gear than it is to ask for permission. Woohoo! -
Thanks bro. I watched a hell of a lot of tutorials on these bad boys. I've since made a second one in my other subtank mini and it came out really good as well. Next I'll try a fused clapton and see how that goes.
-
Just built a clapton in the new RBA section (see pics in the post your build section). I wanted to come out with a touchdown on the first build. I think the build was a touchdown. As far as performance so far so good. Wicking is totally different but so far the wicking is keeping up with the build. I really like the screw on the side of the chimney as it makes removing the chimney so easy (not like the original which for me was a pain to remove every now and again. The top cap for the chimney also has an o-ring making it so much more easy to remove (that little cap is also a pain in the rear to remove from the original subtank mini every now and again). This new subtank mini is definitely a keeper. Plus I love the matt style finish it comes with.
-
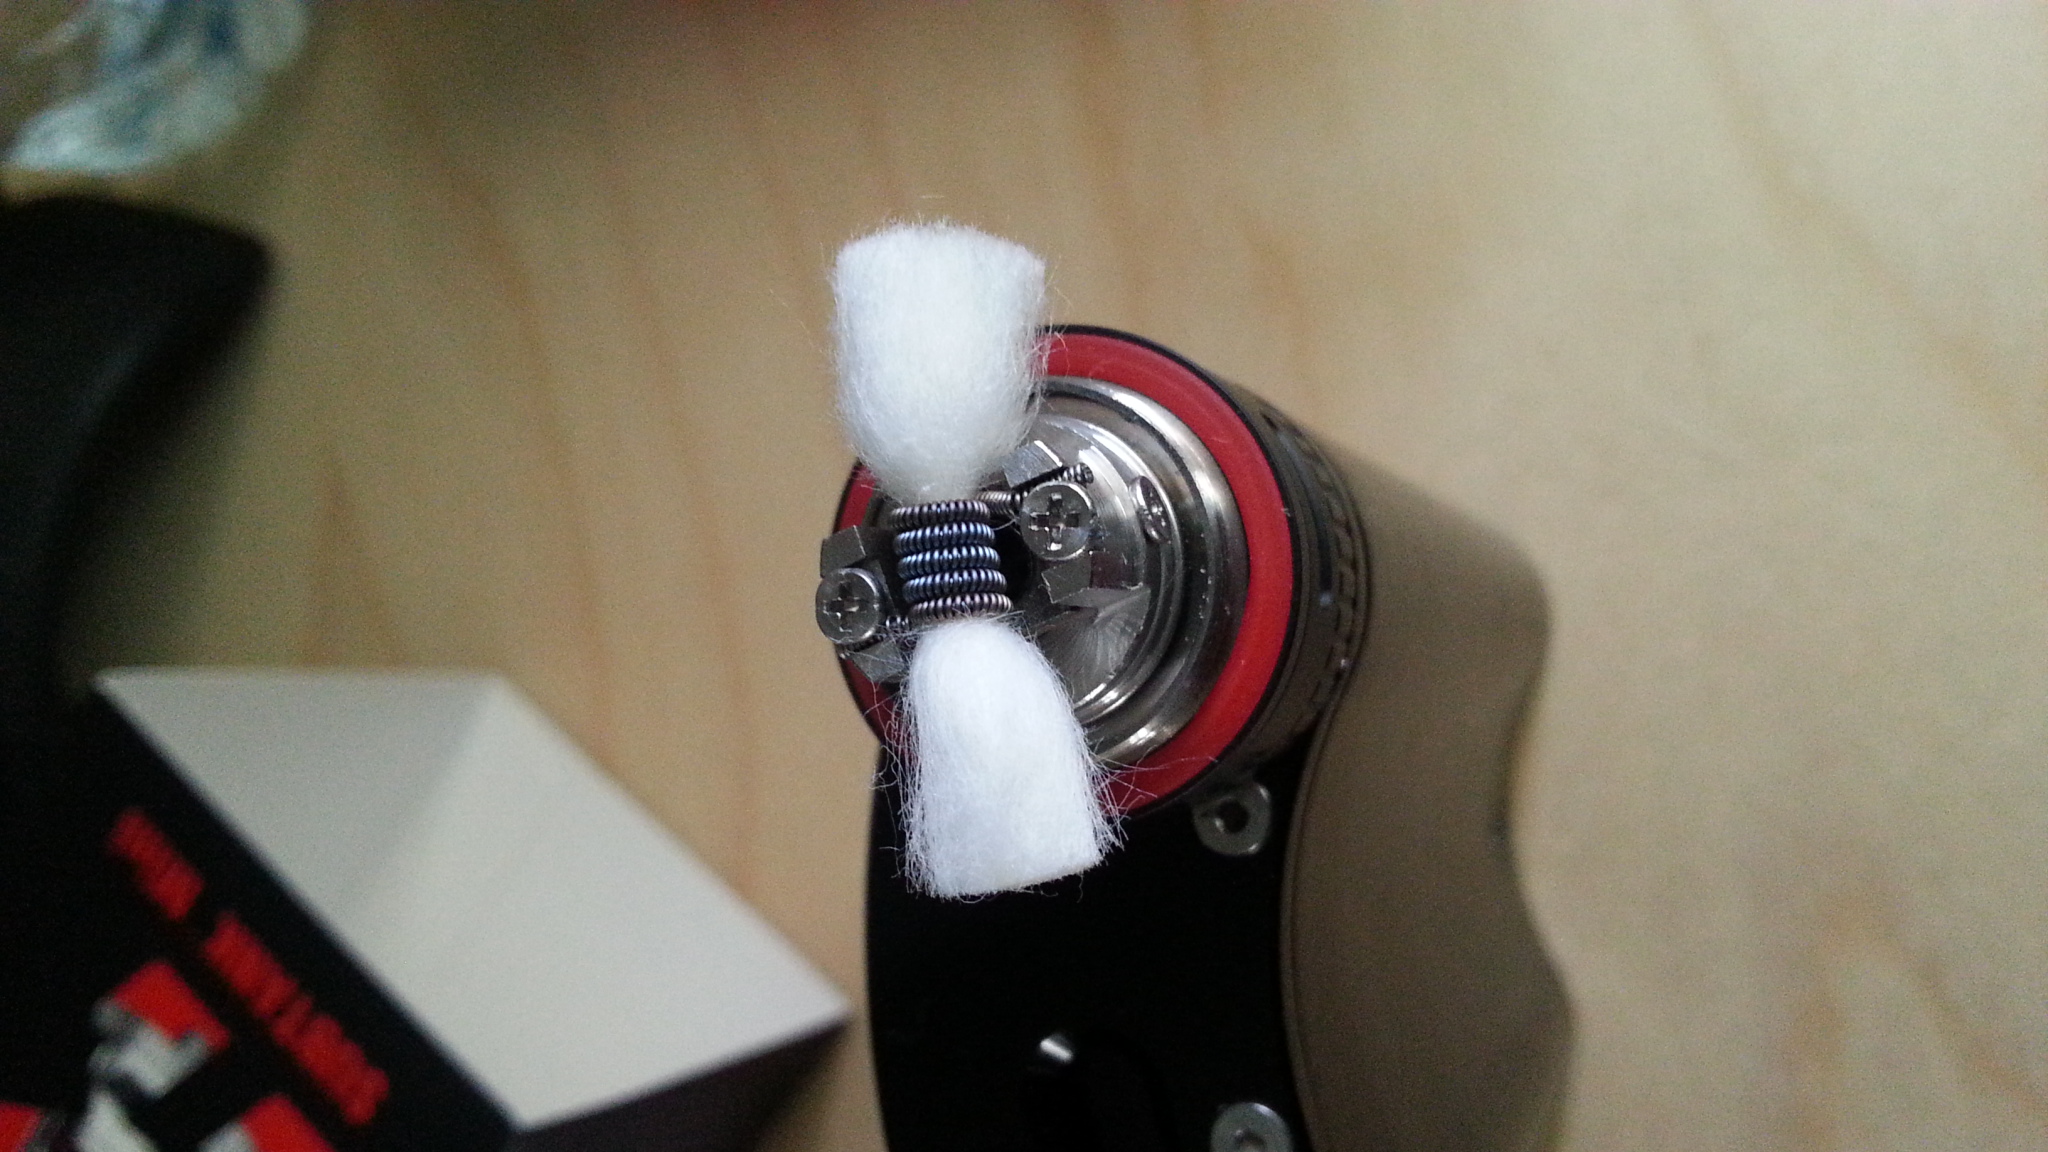
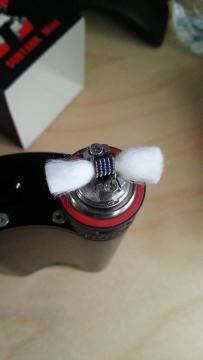
Here is my first attempt at a clapton coil (just bought a cordless drill in Iraq). I've always wanted to try a clapton and now I've got my chance. This build is in my new subtank mini v2 with the new rba section. For the build I used a 26ga kanthal core wrapped with 30ga kanthal. 5 wraps around a 5/64 screwdriver came to .67 ohms. I will continue to practice with kanthal (as I have tons of it), but I want to eventually build a clapton with ni200 nickel. This build has awesome and flavor....OMG. I have been missing out here. The vapor production is some of the best I've had in an RTA.
-
Absolutely. I can't wait to get into that rba section. ^^^You too Tam.
-
Heck I don't...lol I just ripped it out and it was there. I am glad though that you put my fears to rest. It's always good to know what they put in our vape gear. Thanks again bro.
-
Ya you are probably right Earthling. How does someone tell if something is plastic or silicone? Is there a way? How much heat does it take to melt silicone or wont it with the temps that we are using?
-
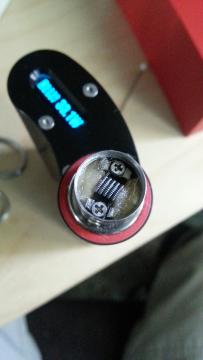
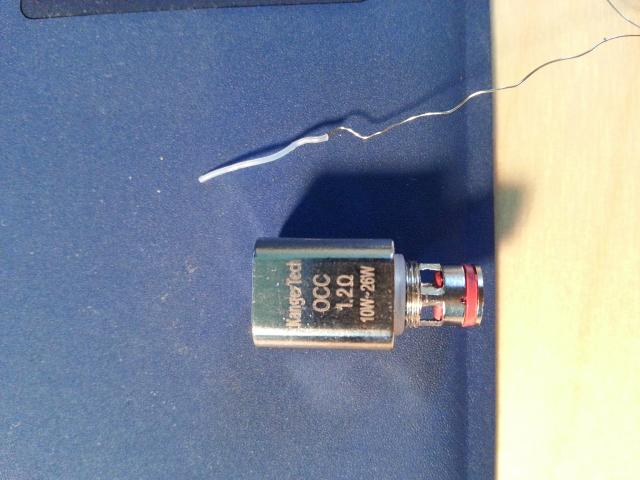
Hi all. Today I just received my new Kanger subtank mini v2. I put in the .5 ohm prebuilt coil in it and it working flawlessly. Taste is great and the airflow even better than the original subtank mini. I took apart the 1.2 ohm coil to look at the insides (never vaped it). When I took apart the coil I noticed one of the coil legs had a plastic sleeve on it as some type of insulator. Is this right? In my experience coils get very hot and if there is a plastic sleeve on it would it not be prone to melting? I have included a pic of what I found. Any insight or user experience would be very grateful. At the end of the day I really don't care about the prebuilt coils because I will never use them. I'm more of a build my own type of guy.
-
Nope none at all. Well there was a little at first because I over saturated my wick during the setup, but after the first couple of puffs nothing at all. Definitely no leaking what so ever.
-
Ni200 vertical coil in a subtank mini verdict after 2 days and 4 tanks gone and a wick change compared to the same ohm horizontal coil............ HOMERUN! Very little to no spit back like a horizontal coil. Flavor imo 50% better and the vapor production is out of this world. Gonna stick with the vertical coil for a while.
-
I'm glad the little tutorial helped you out. I know all about the Russian 91%. It was my go to device for a long time. If you have the funds available I would suggest the Kanger subtank mini. It has a very similar build deck but the airflow is much better. The juice channels are larger and allow for heavier vg juices. In my opinion the flavor is just as good. You would not be disappointed. Many others would say the same. The Russian 91% is a top notch RTA but it has its limitations as I've just explained.
-
Welcome Duke. Why don't you head on over to the rebuildable section in the forum. There is a section called "Lets talk temp control" and another called "My temp control experience". Both are great and could most likely give you some insight into some of your questions. Look forward to seeing you there.
-
I made a post a while ago about wicking. Even though the wicking method I used was for the Lemo RTA, I'm certain that if you follow the guide it might work for you as well. Good luck and stick with it. It can only get better. Scroll down about 10 posts from to the post named "Kanger sub mini and you will find the guide there. Sorry I tried copying the link but for some odd reason I can't.
-
Don't worry brother. Just put it down for the day. That's why we have prepared built coils. I have many days like that myself. I just got lucky and had a good one myself. Next time I'm sure I won't be so lucky. Oh and I misquoted on my new coil. Its .13ohms not 1.3 ohms. Sorry.
-
Sorry pic disappeared.

-
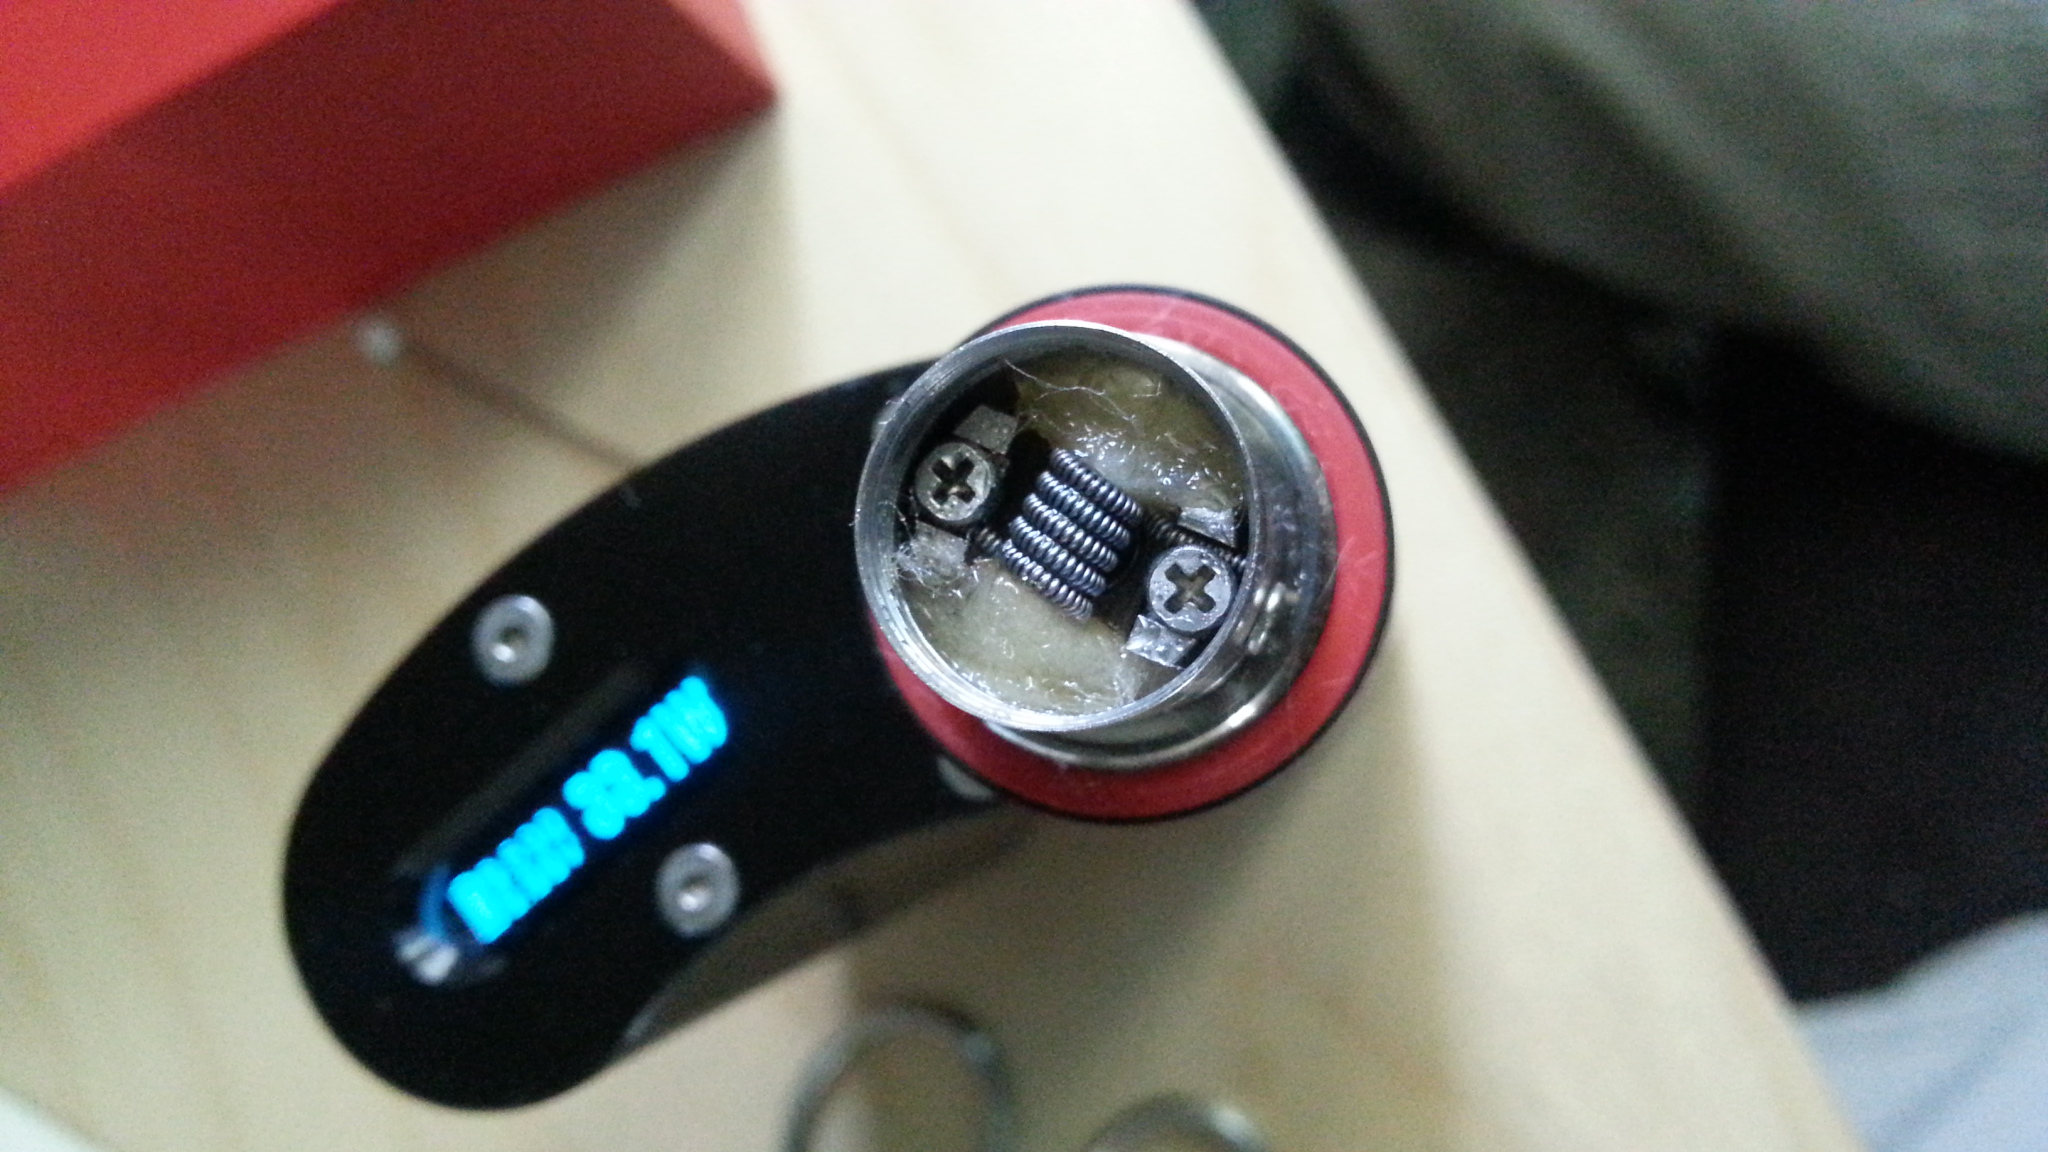
Hi all. I lied. I found myself bored and decided to rip out the 1.1 ohm coil i just made and start with a new vertical coil (practice makes perfect right), plus I wanted to up the ohms a tad. Again 29ga. This time an eight wrap on a 3mm bit for 1.3 ohms. Here's a couple of pics of the build. Enjoy and attempt at your own frustration....just joking. Have fun with it. It's not that hard. Note: Sorry for the order of the pics. I tried editing to get it right and then it gave me a double pic post and I almost screwed it up even more. The system is wonky.
-
Truth be told when I make horizontal builds in the ST mini they sometimes come out of an angle as well. I just roll with it. The vertical was not as bad as I thought. The wicking was more of a pain than the coil install for some reason. I had to take the initial wick out as it was blocking the air hole. Here is a pic with the wick in. I don't want to remove it because it's working perfectly but you should be able to get the idea. As soon as I change out the wick (which should be tomorrow....vaping a heavy dark vg liquid pretty hot so the cotton is already getting to color a bit).
-
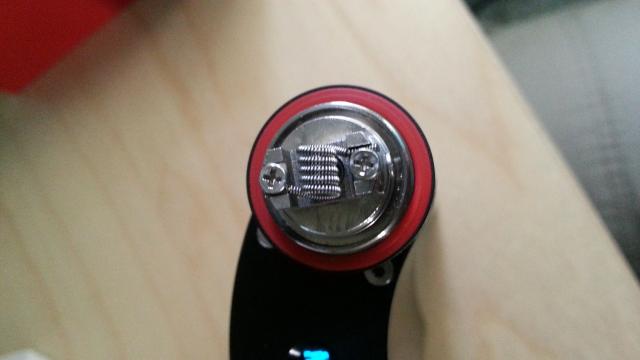
Made my first ni200 vertical coil for my subtank mini. 7 spaced wraps with 29ga ni200 on a 3mm coil jig bit came out to .11 ohms. Wicking it was obviously a tad more tricky and I can improve but this is a pretty good build for my first attempt. Happy vaping days ahead. I had really steady hands and a good eye today. Wish all days were like this.
-
I have not yet only because I do not dry fire my coils and in my experience with kanthal no matter how tight and perfect I make a coil it always has some type of hot spot that I have to work out by dry firing. I'm sure others have tried though.
-
I made a great kanthal on my Zephyrus yesterday and vaped it for a few hours (only takes a couple hours to drain that bad boy) and found myself missing my Subtank mini with ni200 and TC. I don't think my Zephyrus will get much action anymore, as I'm really loving my TC. I should have my new Subtank mini v2 next week and look forward to trying it out.