


Mr Smith
-
Posts
132 -
Joined
-
Last visited
-
Days Won
2
Posts posted by Mr Smith
-
-
Just an update: the airflow screw finally drove me bonkers enough and I went through with my idea.
It worked out just how I thought it would! Screw is nice and snug now. no more backing itself out or being loose and sloppy.
I only flattened one of the threads on the end of the screw, so it still starts in the hole nice and easy then once it gets in all the way it becomes more resistant to turning but not so resistant that you are forcing it.

Highly recommend this as all you need is a pair of pliars to flatten a thread on the screw by squeezing one of the end threads with the pliars.
-
Mine doesn't get stuck but it does have the stupid airflow screw issue. That screw is just too sloppy..
it has crossed my mind to take the screw out and partially flatten one of the threads on it to make it a thread lock screw.
It has also crossed my mind to put lock-tite on the screw and run it back in, but I don't like the idea of a chemical being around the airflow hole... So I think if it annoys me enough I will just take pliers and flatten one of the threads to make it stiff.
-
jeebus that coil is huge!
Makes my 0.5ohm 26g look itty bitty!
-
stacking is fine for a variable voltage device designed for it like the vamo V5...you won't be firing sub ohm with one of those... mine will only fire 1.2ohm and higher. the later versions of the v5 will only fire 1.3ohm and higher...
but in a mech mod: no way jose! stick with 18650s or single 18350s...
-
I have a Smok Magneto and a KFL+ running 26g wire at 0.5ohms on it.
Works great and the fit great together too!

-
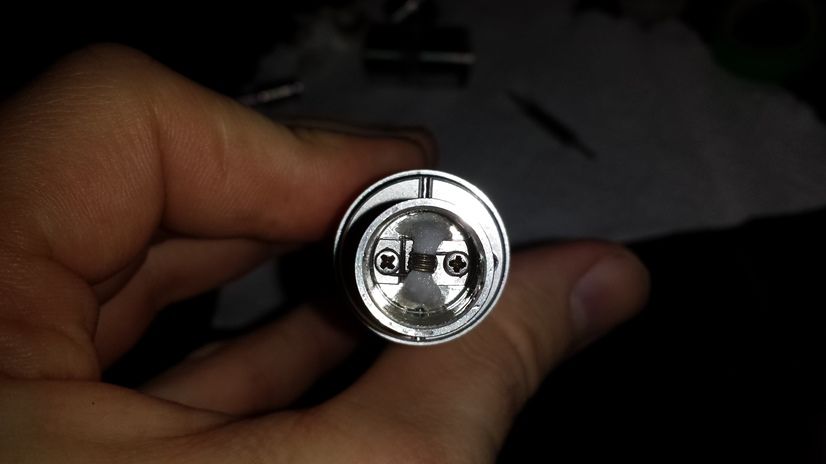
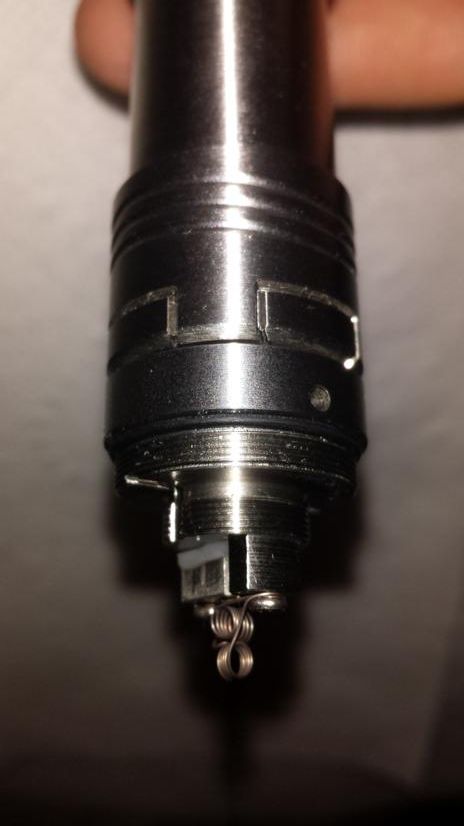
I took a few pics of the properly wicked 26g 0.5ohm build:

-
thanks for the tips smith. I rebuilt it with 26 guage and organic cotton, but im getting a really tight draw. Just need to adjust the amount of cotton I have in there and I think it will be sorted.
does your KF have adjustable airflow? and how are you building yours?
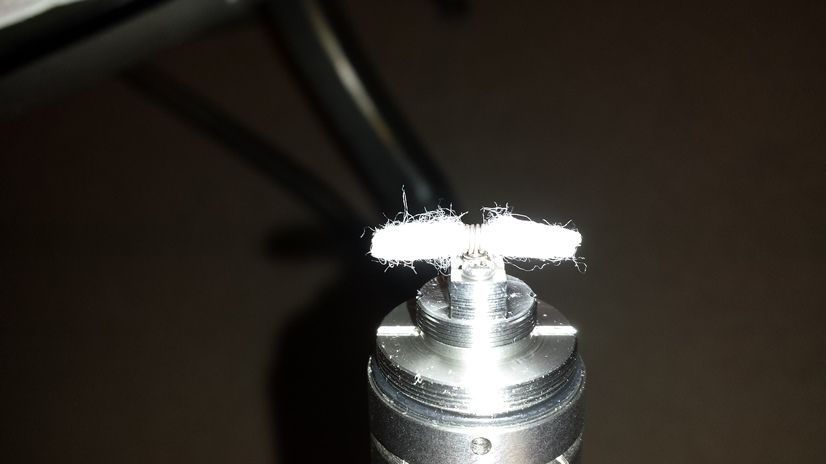
I need to start taking pics of my builds again lol. I haven't taken a pic of my single coil builds since my 32g 1.6ohm builds for the vamo.
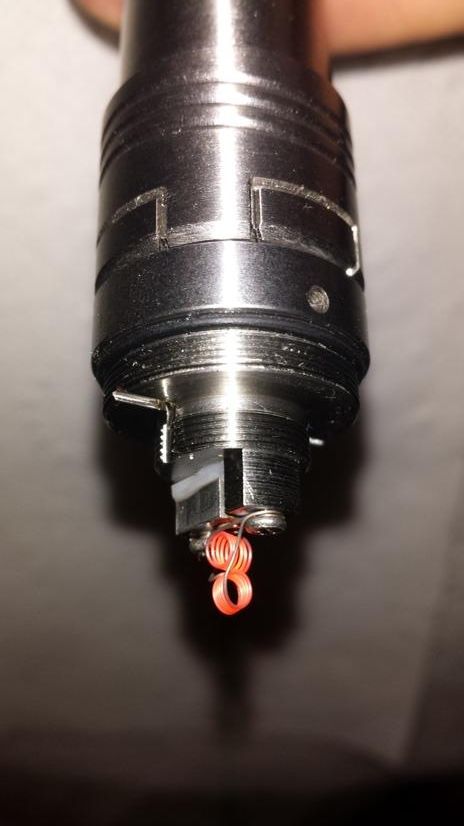
This was a 32g 1.6ohm build:
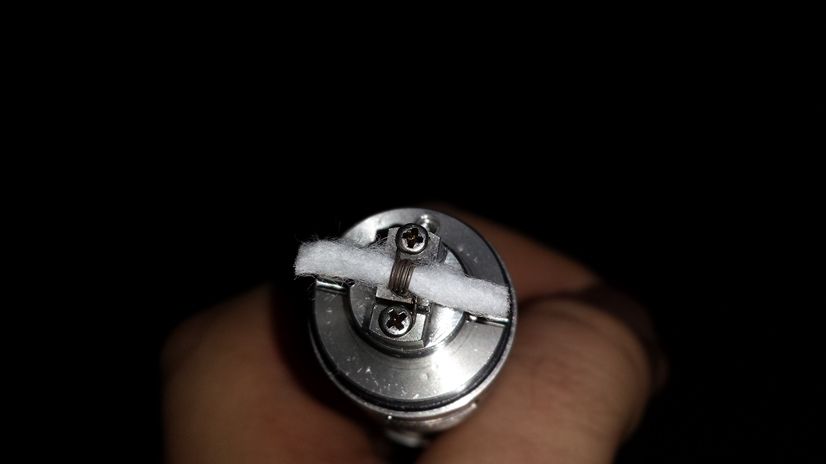
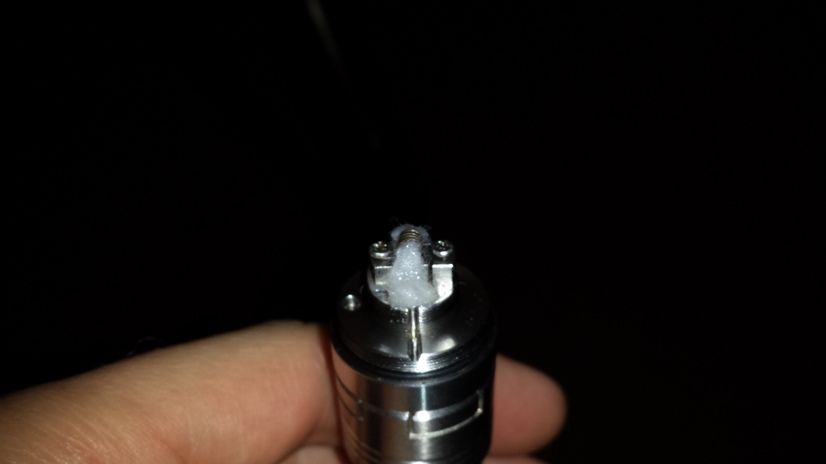
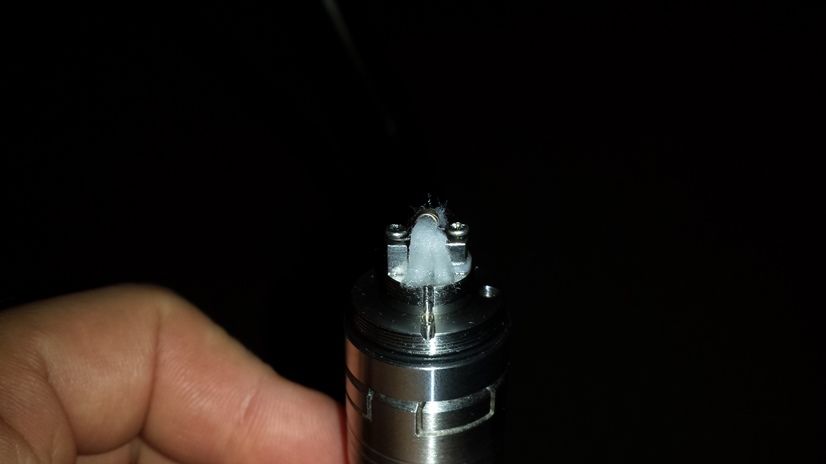
This wick will kinda give you an idea of what to do, but it is also an example of something that would cause a leak...
I basically was just using scrap pieces of cotton as wicks to test flavors from the KFL+ using it as a dripper. a normal build for me would have the wick slightly longer to where it covers the juice ramps.
the upper right area is closer to what it should look like, but still would need a little bit more wick to work properly... gives you an idea though.
and again I use 26g now @ 0.5ohm so that is about 4.5 wraps. The 32g build was for my vamo because at the time I didn't have a mech mod to fire a sub ohm build.
-
If I had these back in my younger teen days...YES! kidding me? smoke on the bus and get away with it?! smoke behind the auto shop at school and have no smell and get away with it?!
As a young adult when I would go to bars and such...maybe..
now in my 30s...if I had never smoked in the past.. probably not.
I do miss the outside smoke breaks though... was quite a social time... now I just vape on the couch or at my desk or in bed, in the car... don't have that 5-10 minutes of grabbing your friend or your girl and going outside for a smoke break anymore... so It's not such a social activity anymore...
I suppose if I still worked in an office building I would probably go outside for vape breaks, but I've worked from home since before I quit smoking, so hard to say for sure.
-
it's all in how you wick them and set the airflow.
The wick can make or break the build.
too short of a wick will cause leaks. too much wick or too little airflow will cause dry hits.
too little coil surface area with too much wick will cause burnt wick...
I suggest finding a build that works best for you and stick with it.
The build I have been liking and running a little while now is a 2mm, 26G, 0.5ohm single coil with some organic cotton going straight through the coil and fluffed out ends going down to the juice ramps.
sometimes I mess up the wick and it floods, or I put too much and it doesn't draw worth a crap. but 90% of the time I nail it and it works beautifully.
I leave home every day with it and vape it all day long without any issues. I usually change my wick out every 2-3 tanks now. used to change it every tank because I was burning wicks but I got that sorted out by using thicker wire with lower ohms for more surface area..
-
I'm really liking my simple single coil build in my KFL+ using 26g wire @ 0.5ohms. producing excellent flavor and not burning my cotton wicks using my mech mod.
-
there are quite a few youtube videos out there that will help you with building coils.
wicks are a sinch.
tools that make the job easier to build coils:
tweezers
wire cutters
dedicated drill bit for coil building 5/64" (you don't want to use a dirty drill bit, and the bit is cheap. bought mine for $3 at the hardware store)
scissors (for trimming the wicks)
butane pen (soldering) torch or a small propane torch to heat the wire prior to coiling it. (not absolutely required, but it definitely makes coil wrapping a LOT easier)
lastly an ohm reader for vape coils (your vamo will work)
if you get a kayfun clone it will come with a screw driver that will fit the post screws.
Then you just need the kanthal wire and some cotton balls!
most people recommend organic cotton. you can pick up a bag of 88 organic cotton balls for $4 at walgreens and it will last a VERY LONG time. Wire is best gotten at a vape shop.
I highly recommend 32G wire for use with a vamo and shoot for 1.6ohms.
If using a mech mod then go with 28G wire and shoot for 0.8ohms.
-
I would second the kayfun lite clone and some 32G kanthal wire.
wrap 6.5 times around a 5/64" drill bit and center it on the deck. Make a nice 1.6-1.8ohm coil that will fire in a variable device just fine and near instantly. The thinner wire heats far quicker than the thicker wire making it not take a while to get a good amount of vapor from the coil.
Once you get comfortable with building single coils at 1.2ohm+ you can step up to a mech mod and try a more difficult dual coil build (more difficult with a kayfun anyway since you are limited on space and only have 2 posts unlike most drippers) and go for sub ohm.
You may just decide you like it as is and not change from single coil as a single coil with 32G at 1.6ohm works amazingly well!
-
used to be my KFL+ with vamo v5 running a 1.6ohm 32G single coil.
now it is the same KFL+ with a magneto running 32G dual coil @ 0.8ohm
-
got my first mech mod today: The "Magneto" by "smok"
-
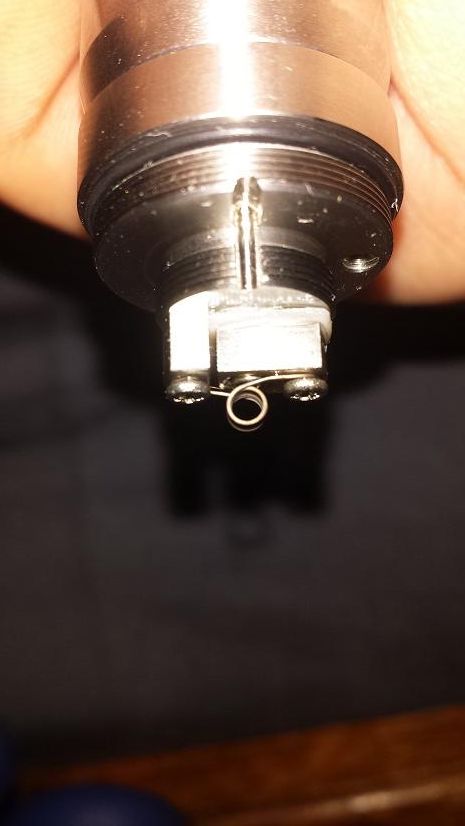
first sub ohm build since I finally got around to buying a mechanical mod (magneto)
0.8ohm with 32g 5.5 wraps on bottom, 5 wraps on top; dual coil.
and the mod firing it:
- christov11 and NewDrip
-
 2
2
-
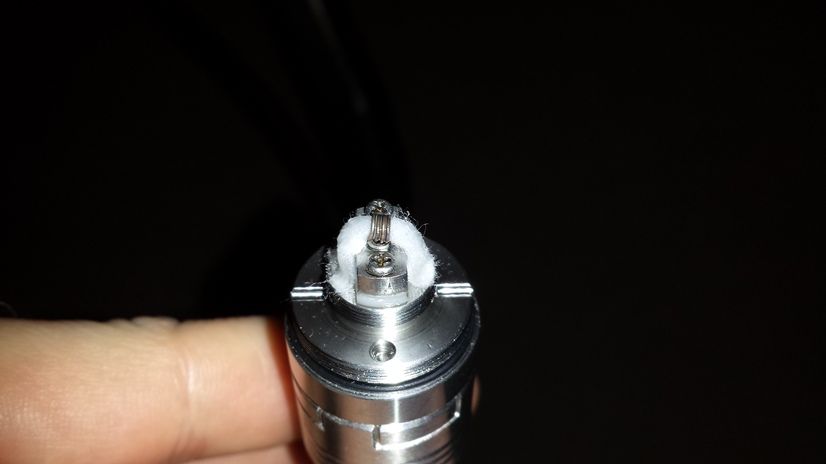
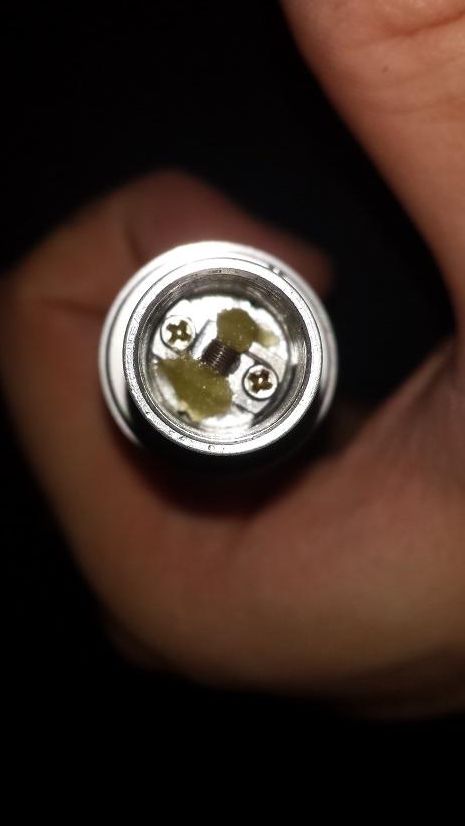
my first attempt at a dual coil build in the KFL+
picture kinda sucks but I was more anxious to try it than to take pics of it.
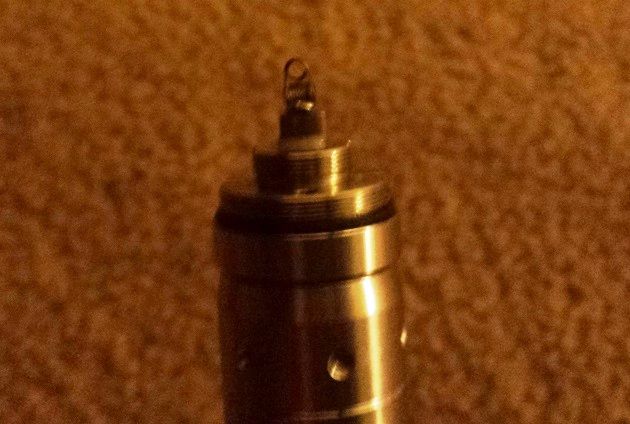
I believe it was about 9.5 wraps each. 32G wire, the pair came out to 1.2ohm (minimum my vamo will fire)
-
mine does it too. not a big deal for me. Just need to wipe it out every couple days and good to go again.
-
kayfun clone
in RTA
I have a KFL+ clone and love it. Has been working great for months now
-
always pre-soak the wick and coil. always always always!
-
I still want to get a SS mesh wick to work properly without shorting out...
I had one working for about a day and then it shorted the coil and took the coil out.
doesn't seem to matter how much I torch the crap, it eventually shorts out. Wonder if pre-oxodized mesh will work any better.
The flavor was amazing when it was working, but the problem is that it doesn't last more than a day before it decides to short out my coils.
-
dayum! burn wicks much? lol
Those look like they had to have tasted horrible...
-
I run 6.5wraps with 32g and come out to 1.6ohms. works perfect in my KFL+ and vamo V5.
Ignore the wick..I was taste testing flavors and using it like a dripper with scrap pieces of cotton. I normally have more wick than that for a regular build so it doesn't flood.
believe me when I say: you don't need 2.1ohm to get a nice vape from a kayfun. It's a completely different experience from a pre-built coil/tank setup....
the vape is much much cooler from a kayfun, the volume of vapor is at least 10x more than any regular tank, and the flavor is ridiculously strong.
and if you wick it right (it will take some practice and learning to get it just right) it will never get a dry hit...you can chain vape it back to back 5+ times in a row without taking a break and it will keep right up with you without vapor getting hot.
-
Does the kayfun have the screw on tip?
nope. Just o-ringed 510 drip tip.
no barbs in there either to help hold it so a snug fit is ideal for the drip tip.
-
i have 3 different mods and like 8 different tanks hahaha
I only ever use one of them anymore, but in case of emergency...i have backups and spare batteries, and spare mods

Coughing
in General Vaping Discussion
Posted · Edited by Mr Smith
rare occation with dry throat i might cough cause it tickles the throat. otherwise no...
I do mouth to lung hits though and vape 6mg nic level from a kayfun lite + clone